

Set appearance
Navigate to Configuration > Appearance in the sidebar.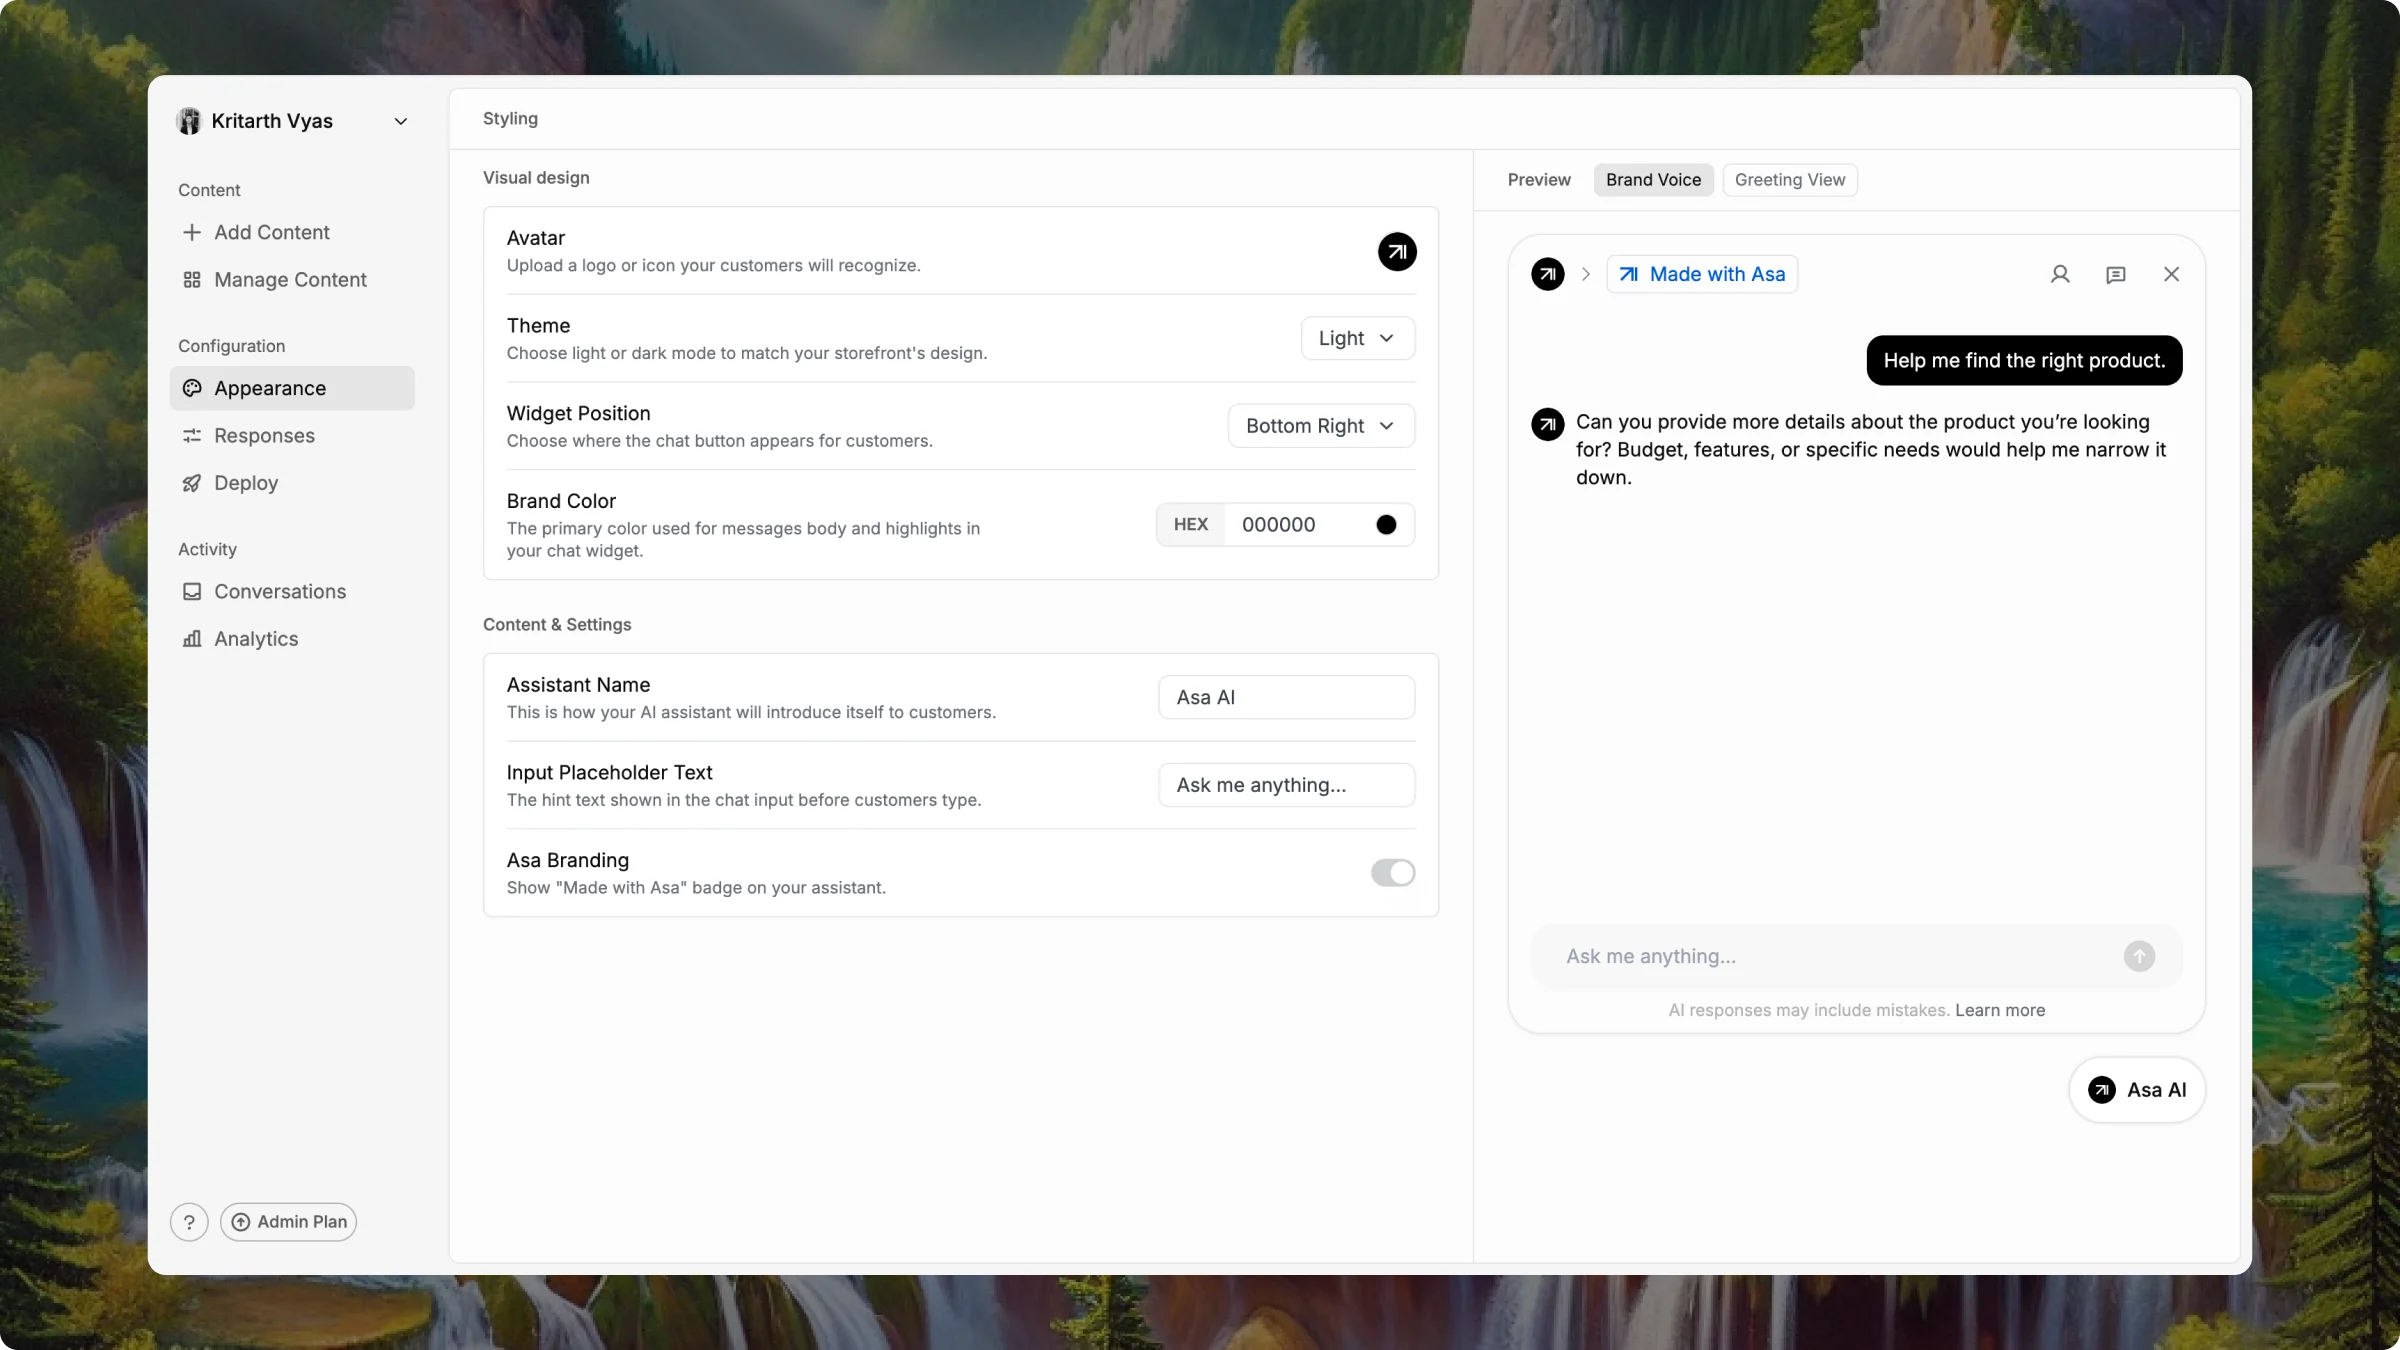
| Setting | Description |
|---|---|
| Avatar | Your logo or a recognizable icon. Shown in the chat header and as the widget button on your storefront. |
| Theme | Match your storefront — use dark if your store is dark. Consistency reduces friction. |
| Widget Position | Bottom right works for most stores. Use bottom left only if a fixed element (cart button, sticky bar) would overlap the widget. |
| Brand Color | Primary brand HEX for message bubbles and highlights. Most merchants match their storefront CTA color. |
| Assistant Name | How Asa introduces itself — for example, Ask Nike or Zara AI. |
| Input Placeholder | Placeholder text when a shopper starts a new chat — for example, Find your fit… or Ask about ingredients, routines, or products…. |
Use the preview panel on the right before saving. Click Save Changes in the top right to apply.
Configure responses
Navigate to Configuration > Responses in the sidebar. Three tabs control how Asa behaves.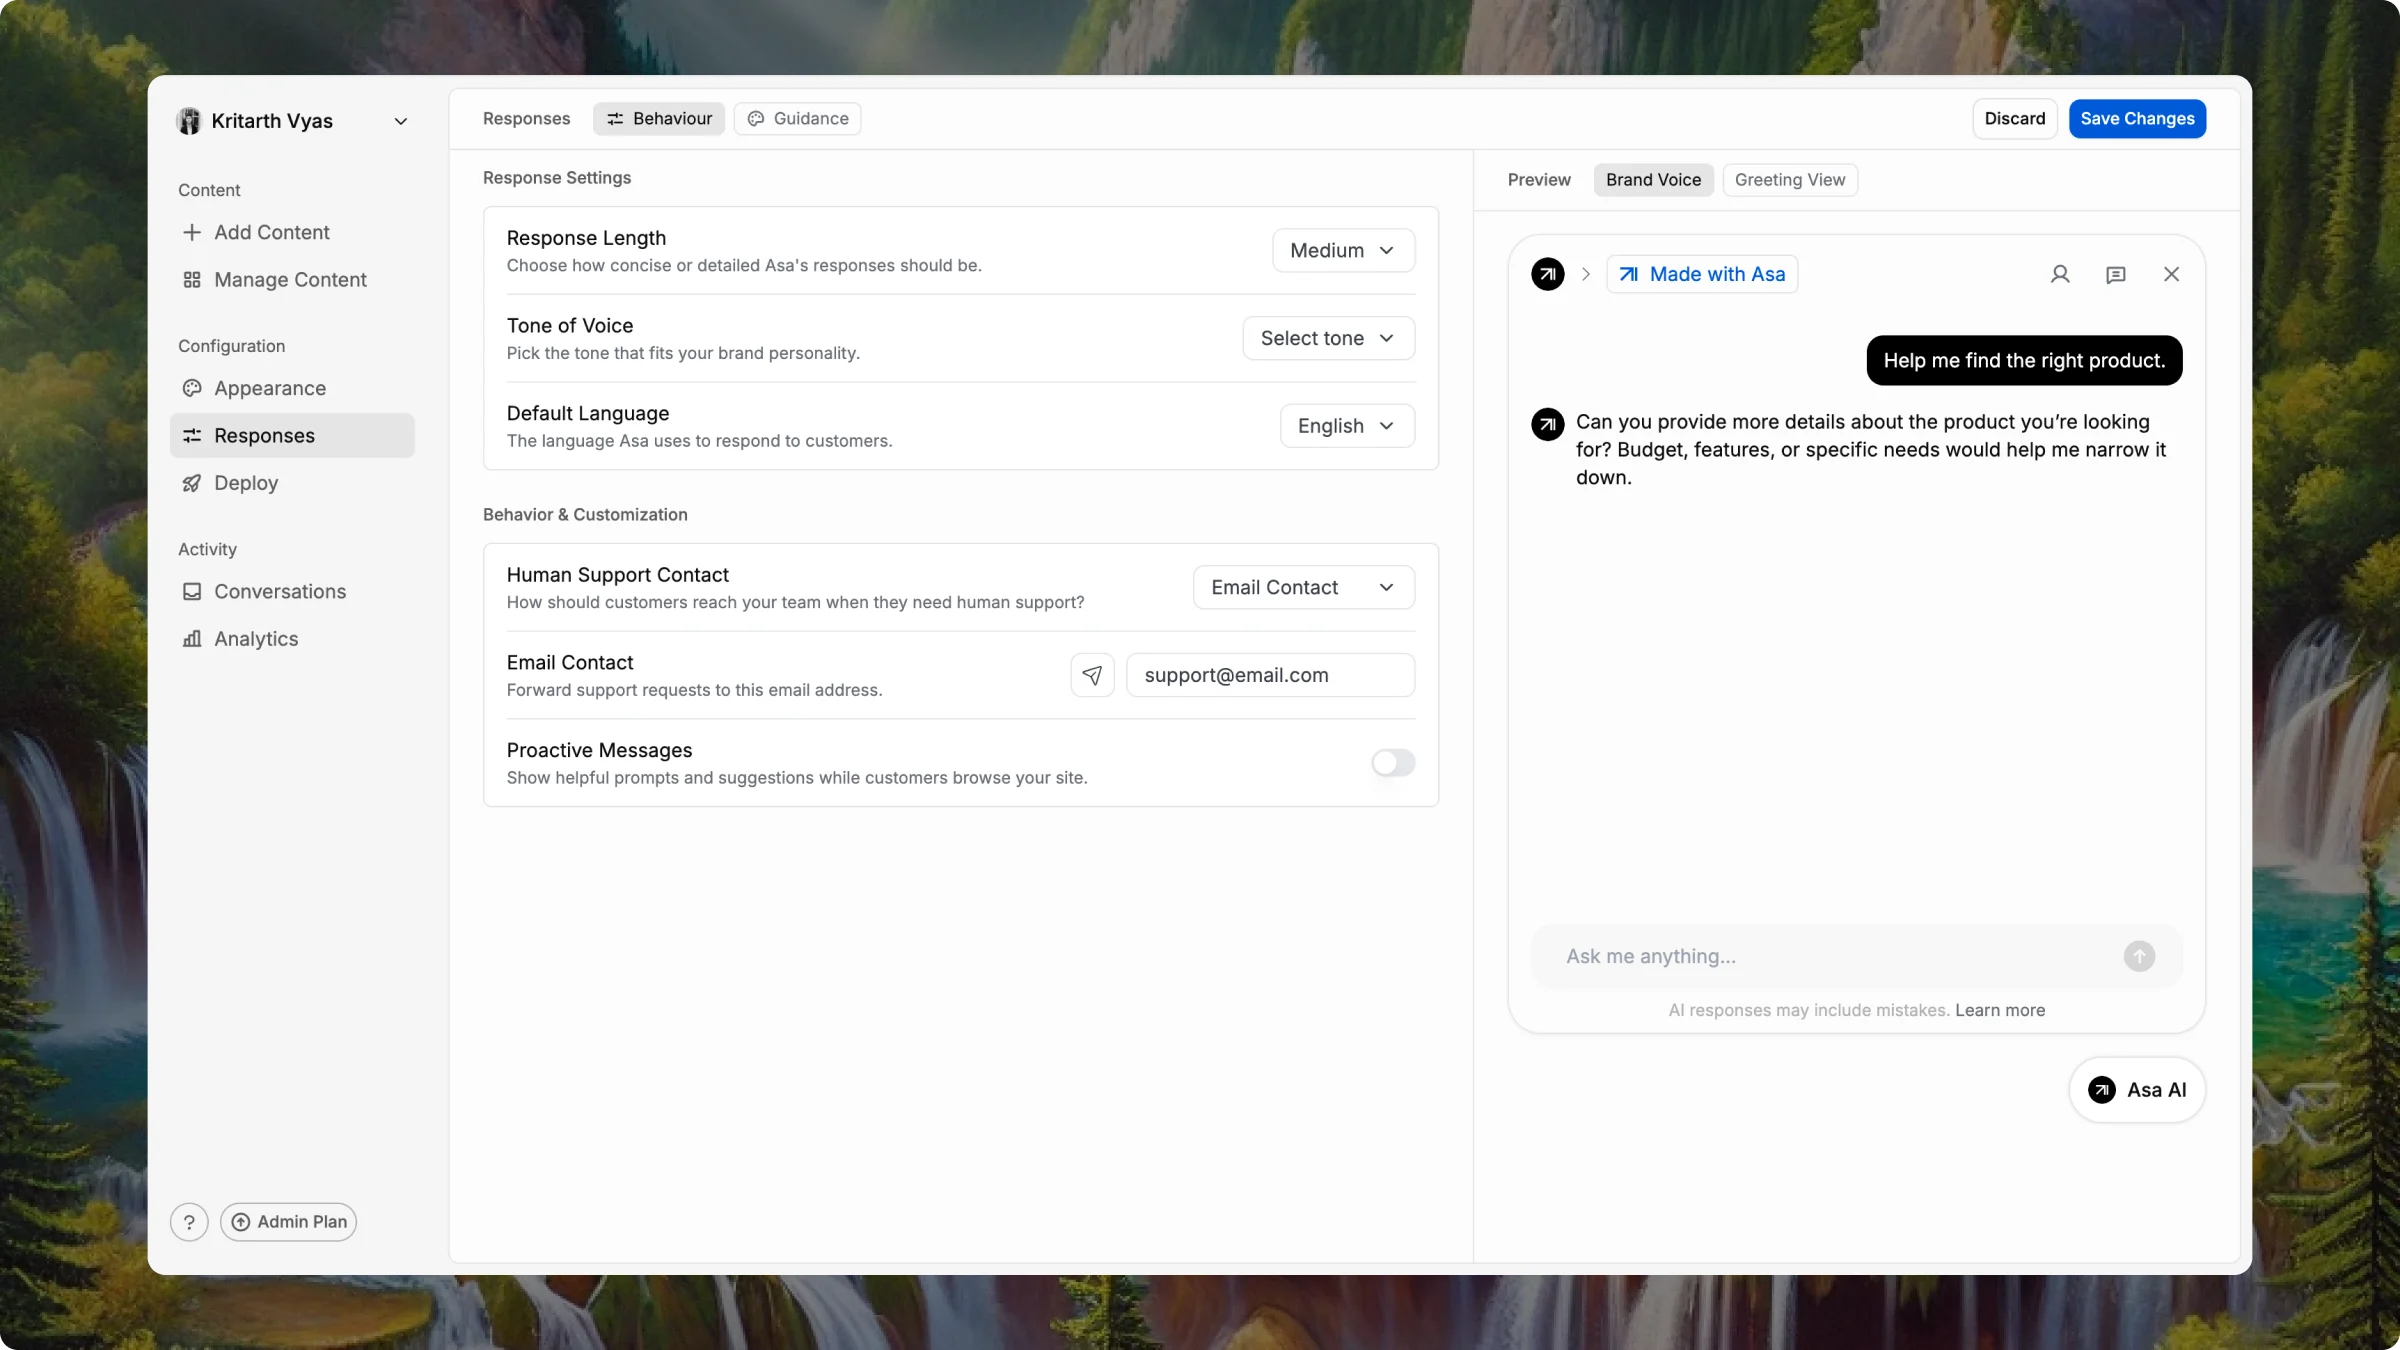
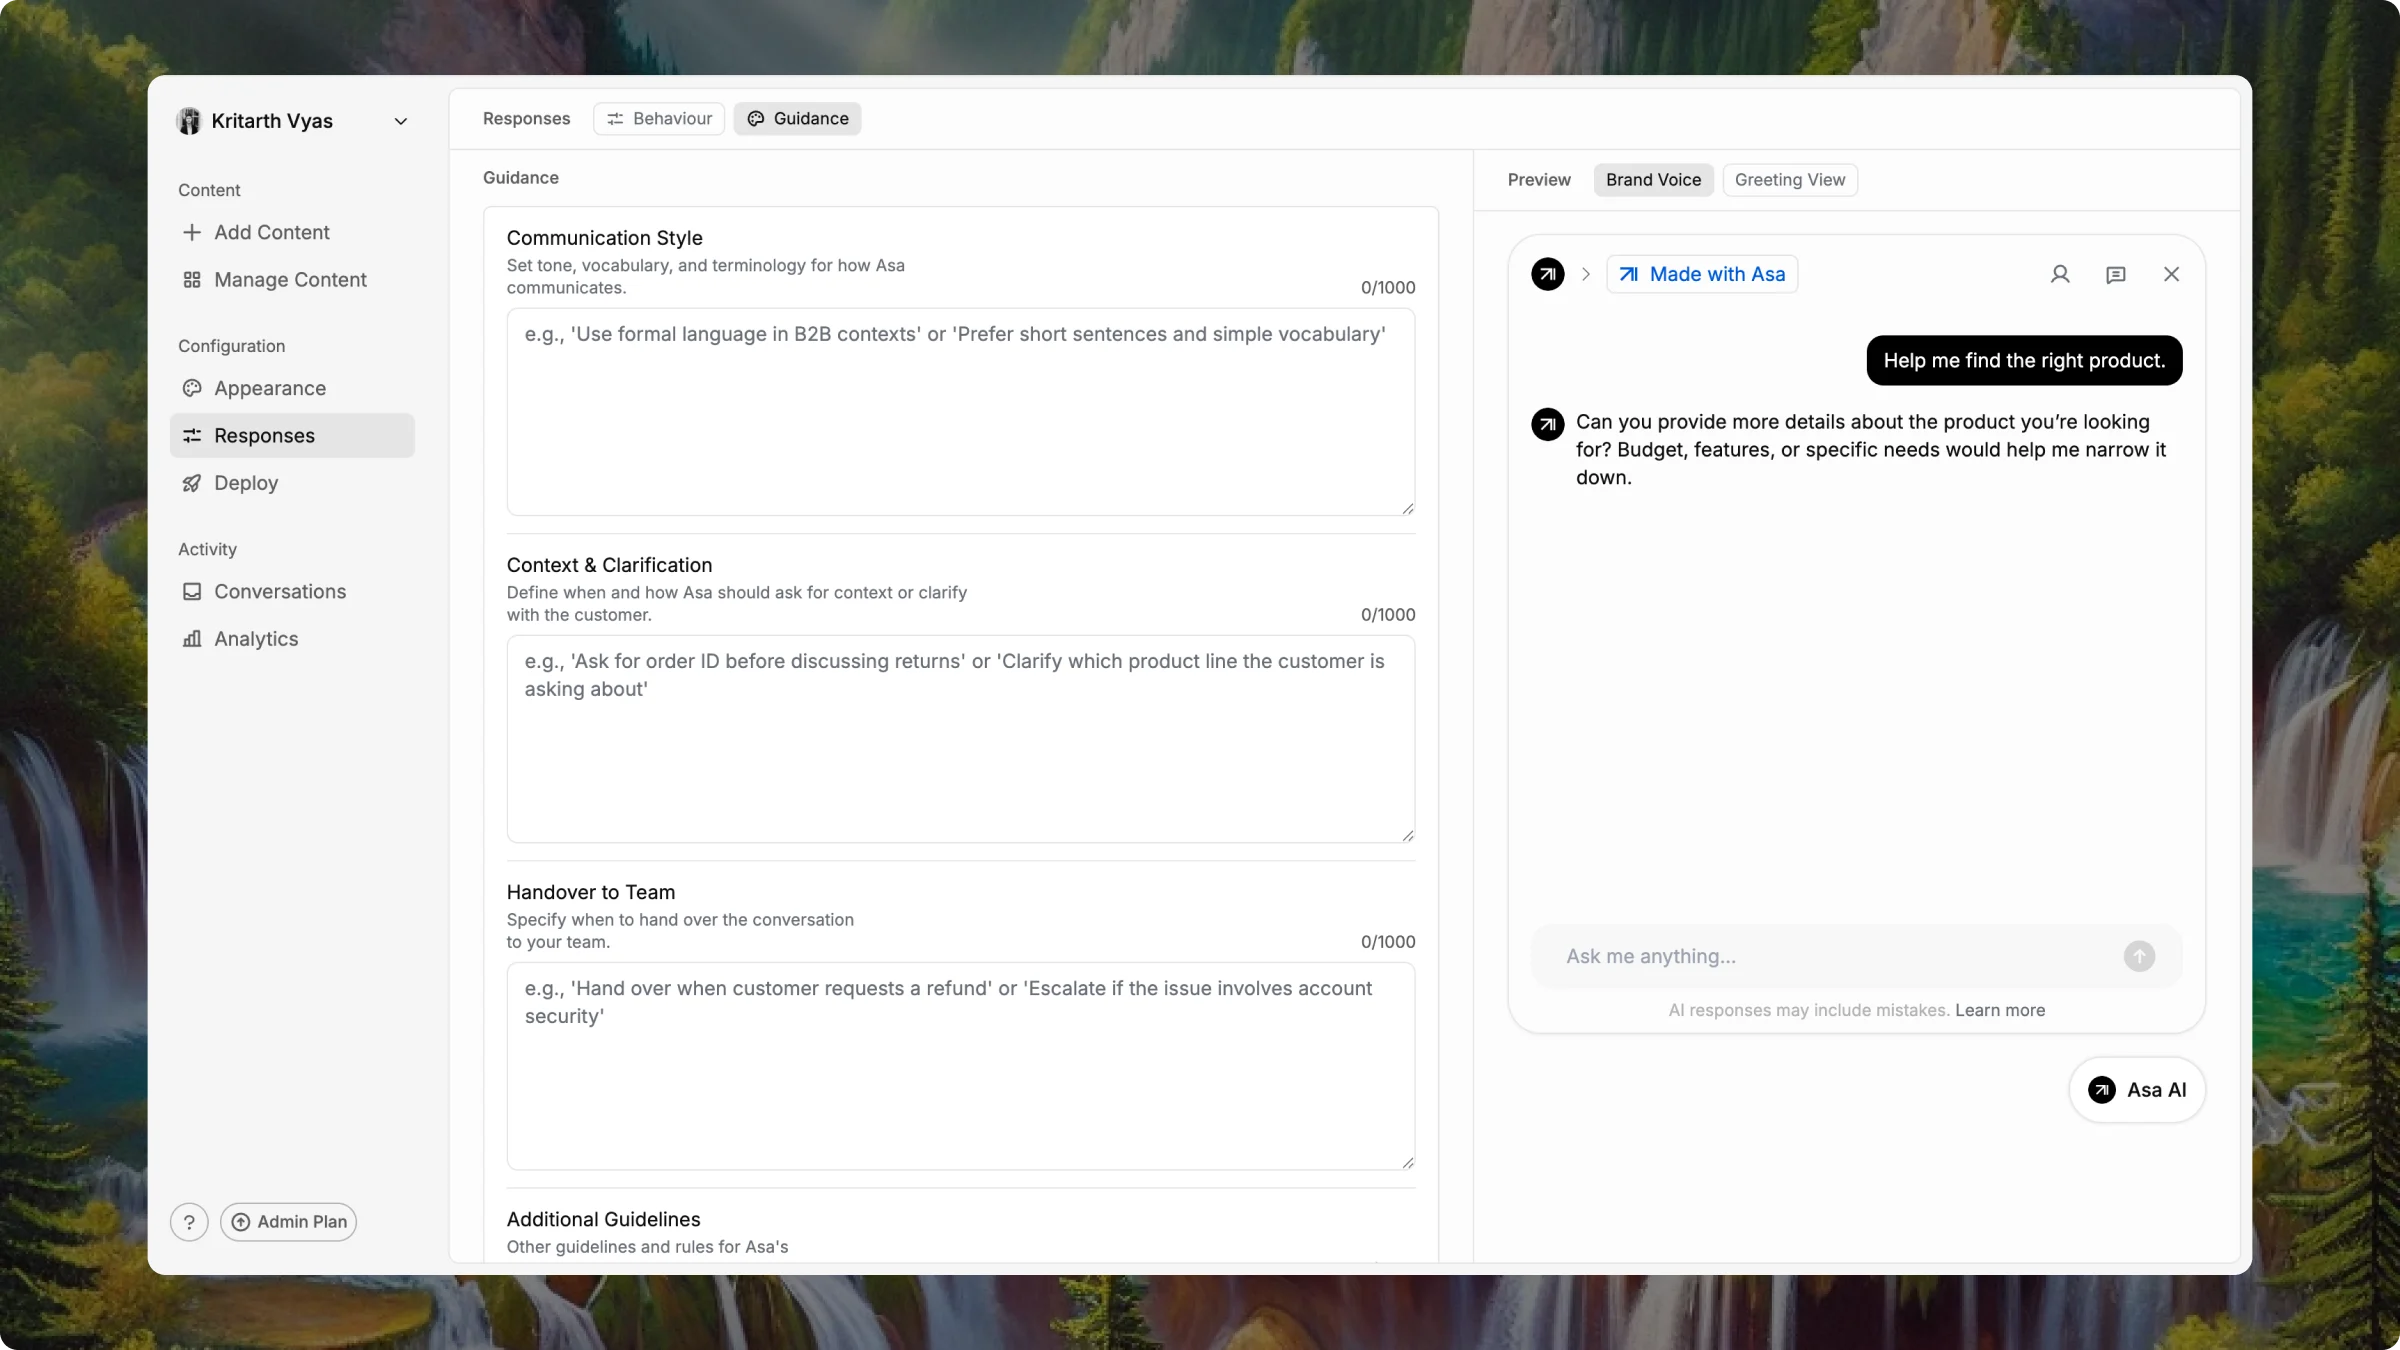
- Behaviour
- Guidance
- Handover
| Setting | Description |
|---|---|
| Response Length | How concise or detailed answers are. Preview changes on the right. |
| Tone of Voice | Brand personality in replies. If unsure, read three strong product descriptions out loud — that tone is usually the right pick. |
| Default Language | Primary customer language. Asa still adapts to the shopper’s language in chat; this is the default only. |
| Proactive Messages | Helpful prompts while shoppers browse — before they ask. Works well on product pages, cart, and search. |
| Storefront Events | Tracking for shopper behavior on your store. Turn this on to power proactive messages and contextual replies. |
Communication Style
Communication Style
Set tone, vocabulary, and terminology. Be specific — vague instructions produce vague answers.
| Brand type | What to write |
|---|---|
| Fashion and apparel | ”Use aspirational but accessible language. Refer to products by their full name. Never use slang. Suggest complementary pieces when recommending.” |
| Health and wellness | ”Use warm, science-informed language. Avoid medical claims. Recommend consulting a professional for medical conditions. Use ingredient names accurately.” |
| Skincare and personal care | ”Use clean, ingredient-forward language. Acknowledge concerns with empathy. Never guarantee results — use ‘may help’ or ‘known to support’.” |
Context and Clarification
Context and Clarification
Tell Asa when to ask a follow-up before answering.Good examples:
- “When a shopper asks for a routine, ask skin type and primary concern first.”
- “When a shopper asks for a size, ask their usual size and preferred brand first.”
- “When a shopper asks about supplements, ask their health goal before recommending.”
Handover to Team
Handover to Team
Define what Asa should never handle alone. Asa follows these literally.Good examples:
- “Hand over when a shopper requests a refund or mentions a damaged product.”
- “Escalate if the issue involves an account, payment, or order that cannot be found.”
- “Always hand over complaints — never resolve dissatisfaction without a human.”
Additional Guidelines
Additional Guidelines
Anything else — for example:
- “Do not discuss competitor products.”
- “Add ‘Results may vary’ when discussing outcomes.”
- Products to prioritize or avoid in recommendations.
Each Guidance field has a 1,000 character limit. One clear instruction beats three vague ones.
Under Human Support Contact, choose where escalations go:
Set handover before you go live. Those conversations are tagged Handover in Activity > Conversations.
| Destination | What it does |
|---|---|
| Email Contact | Shoppers see your support email in the widget when Asa hands off. |
| Redirect URL | Shoppers are sent to your help page or contact form. |
| Gorgias | Escalations create tickets in Gorgias. See the Gorgias integration guide. |
Click Save Changes in the top right after you connect Gorgias or change the destination.
Use the preview panel on the right before saving. Click Save Changes in the top right to apply.